Hello folks, today we will discuss about how to create a send mail connector in Exchange Server 2013. By the name of the connector you might have the idea that what it actually does? Well, very simple, it creates a mail flow from your internal domain to outside domain or domains. I am mentioning domains as it is very obvious that mails only gets sent to registered domains.
At first you have to login into your EAC (Exchange Admin Center) to get you started. On the left pane you will notice that there is an option to configure “Mail Flow”; where all mail transport rules needs to be created, gets done under this option. Click on it.
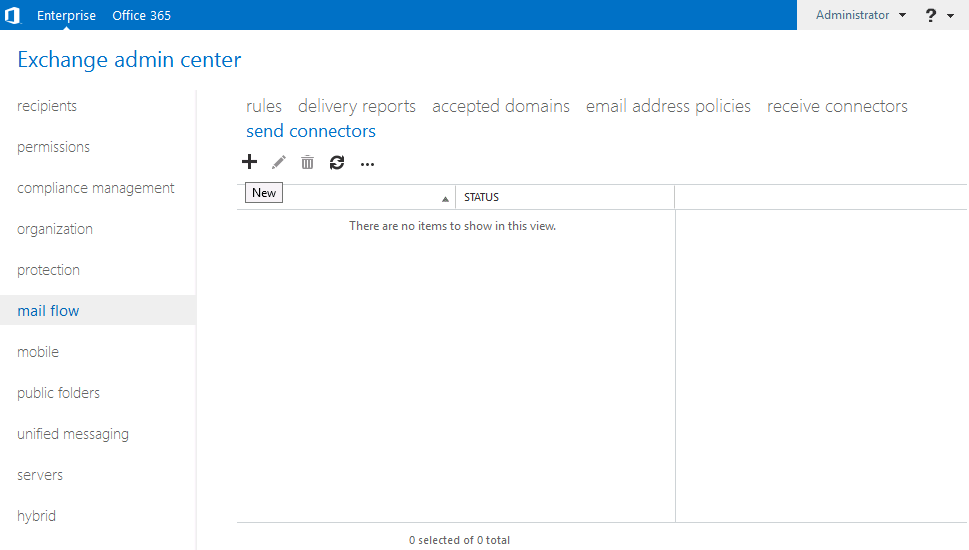
Now you will see on the upper portion of the EAC; the options for “rules, delivery reports…etc.” at your disposal. Click on the Send Connector link and the big plus sign.
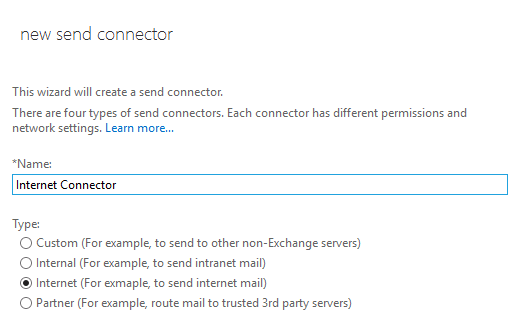 And the new connector setup wizard pops up. Insert human readable name here, so that later on anyone or any Admin could get to know what was previously configured before him J. Just a good practice that’s all. And select the “Internet” type as you want your user’s mail to deliver at internet places.

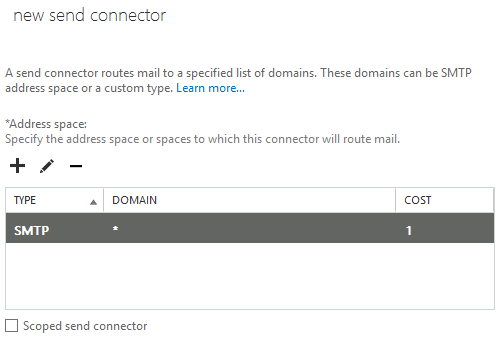
Now Choose the Mx (mail exchange) Record associated with Recipient Domain. And this is where you put in the IP address of a smart host; if you are planning to Route your internet mail via a Smart Host or Spam Filters. Again click on the plus sign to add a domain.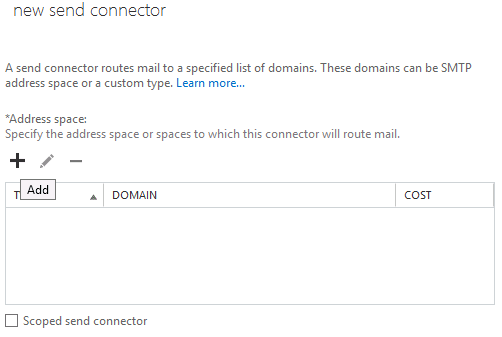 Type “*” to Specify all the domains to use for this Connector, means this connector will be able to send mails to any domains. Since this is an SMTP transport, you might as well put the name “SMTP” in the type of transport field.
Click on the save button, and you will be seeing the following screenshot.
Now if you have multiple Exchange 2013 Mailbox Servers you can configure the source servers as per your Requirements. Click next and your send connector is configured and ready to transport mails to outside world. 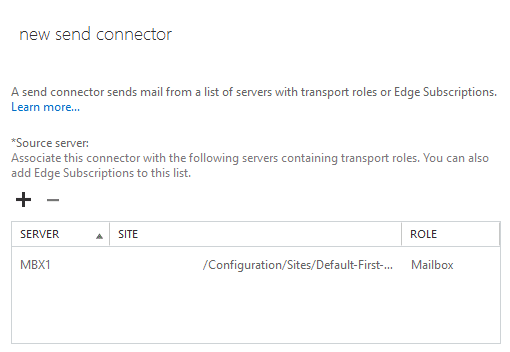
Obviously click on the finish button, to get it done.
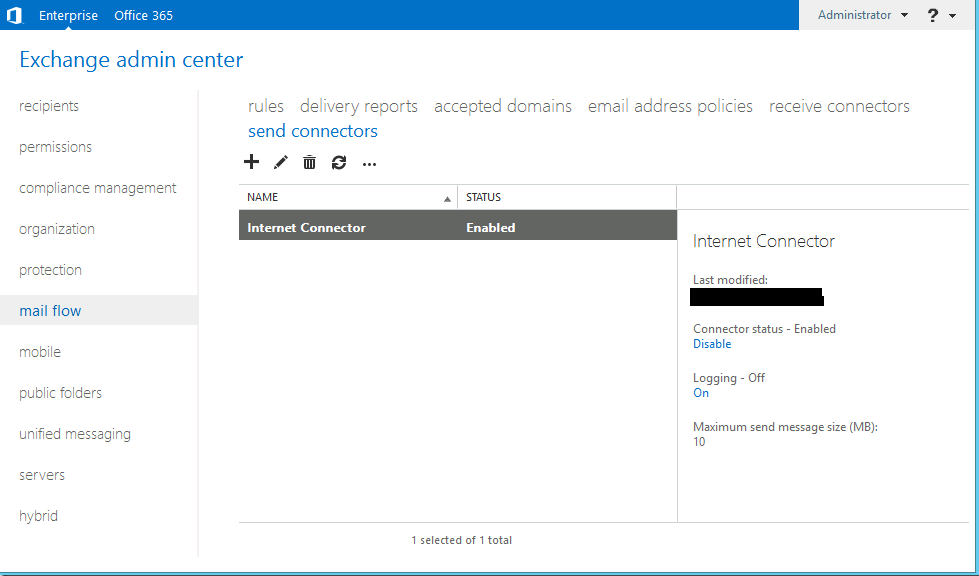
And now the newly created connector gets listed on the send connector, and the primary status would be on Enabled position. On the right side the status for the connector and if you want to disable the connector, both options are presented you for your convenience.
For more information @ Microsoft TechNet site about the Send Connector
Create a Send Connector for Email Sent to the Internet: http://technet.microsoft.com/en-us/library/jj657457%28v=exchg.150%29.aspx