Hello folks, hope you guys are doing great with your busy schedule.
Today I am going to talk about NIC Teaming, and how to configure that using PowerShell. So, first select you server on the Server Manager right click on it and click “Configure NIC Teaming.”

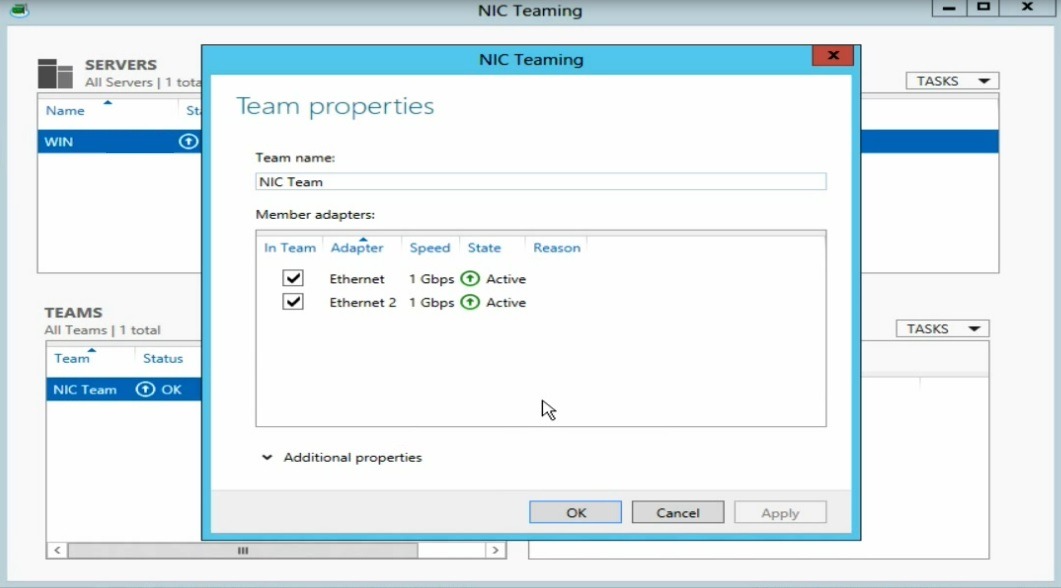
And the following screen appears. Please mind the name of your NIC cards as those names will be required to configure the teaming.

Now let’s get back to the good old command prompt….nope do it in the PowerShell, and issue the following command:
Get-NetAdapter

This will give you the names of the NIC cards, MAC address of it and some other info as well, look out for it J
And since we know the names of the NIC cards, let’s issue the following command to start teaming:
New-NetLbfoTeam “NIC Team”
Please note that the name I’ve used is “NIC Team”, however choose anything you like, it’s not mandatory that you need to do the same. NetLbfo=Network load balancing failover.
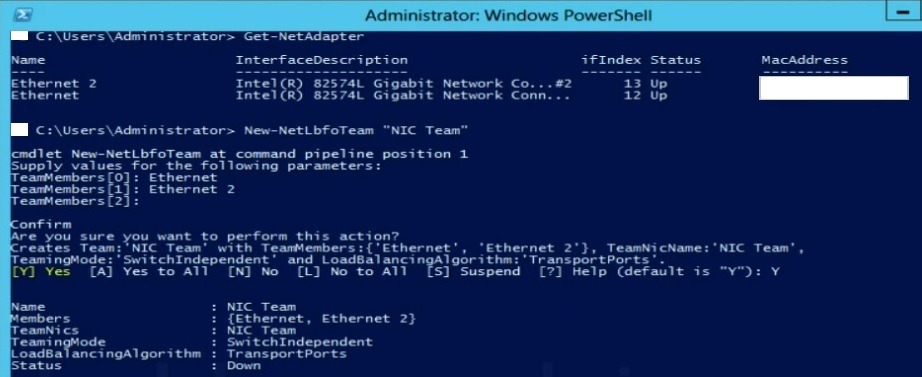
And type in the name of the NIC cards. And finally type in “Y” for the final confirmation. This way you have just created the NIC Teaming with default settings. Initially the status would be down as the software configuration initiates the configuration and it would take only a minute, depending upon your cards configurations ability.
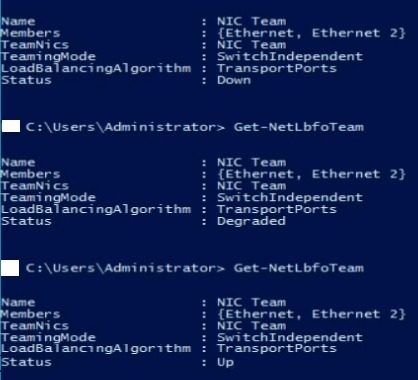
If you want checkout the status of the teaming; issue the following:
Get-NetlbfoTeam
The next status would be “Degraded” and the final status will be shown as “Up”
Now go back to the server manager and check the status update on the teaming.
Be mindful that hardware manufacturers are discontinuing to make expensive hardware teaming options with their NIC’s…so as of now you will be able to do it in Windows Server 2012 all editions.