Hello folks, and welcome back to a dissertation for a domain controller that we will be creating under Microsoft Windows Server 2012. Creating a Domain Controller which will hold all of your organization information regarding users, computers and other devices as well; and is relatively easy developing a Domain Controller.
Previously, worldwide; people used to issue the command “dcpromo” in the command prompt and the Domain Controller Promotion tool gets fired up. But alas! This feature is no longer available starting with Microsoft Windows Server 2012 editions. But promoting a server to a domain controller is still available through PowerShell. Well by mistake or if you still cannot resist yourself from issuing the command “dcpromo” try issuing it from the command prompt.
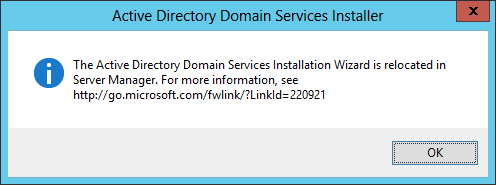
And you will end up with the above informational message; telling you that it isn’t available anymore. You can read it more under the following link: http://technet.microsoft.com/en-us/library/hh831568.aspx
Before we actually start, let me remind you to use a static IP address on your domain controller. I am not going through all the very basics to setup your NIC cards IP environment and all. So the best way to show it all to you by issuing the command
ipconfig /all
And as you can see the server IP address is: 192.168.50.200 and the gateway to my router is configured at 254, the last IP of that series.

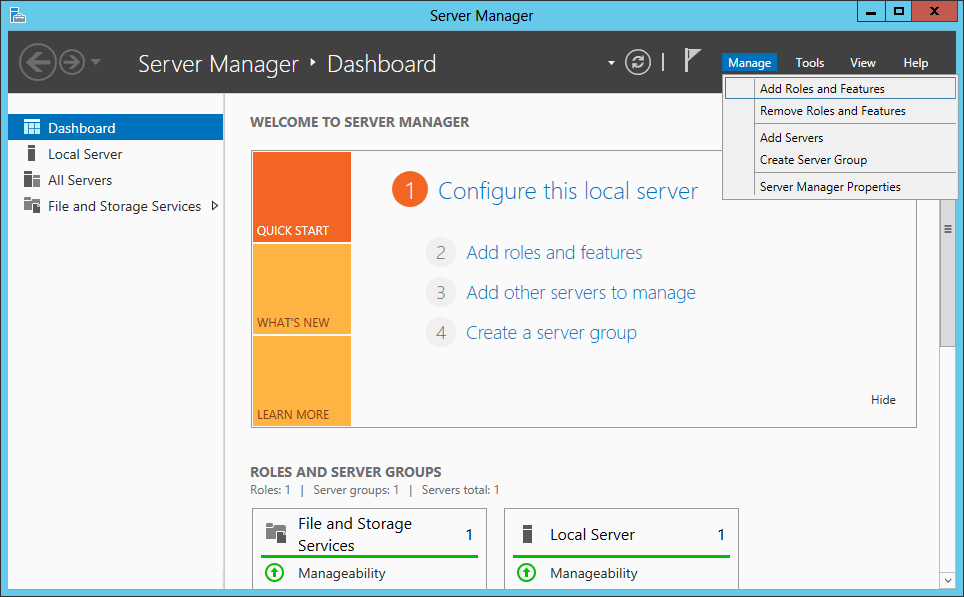
Now let’s open Server Manager, should run automatically when you run the server for the first time. Go here Manage > Add Roles and Features. And click on it.
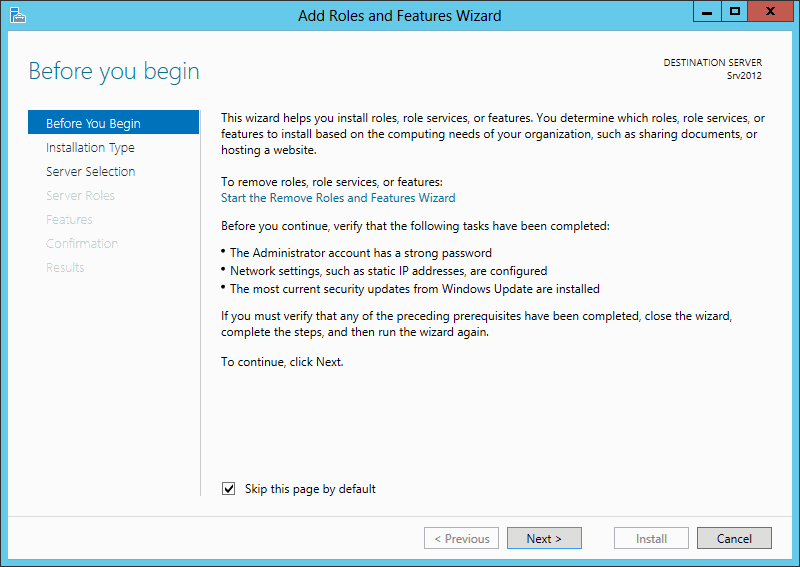
On the initial screen just click Next to continue. I’ve checked the box where it says “Skip this page by default” as whenever you try to install any role services; this screen will appear every time; reason why the check box is turned on.
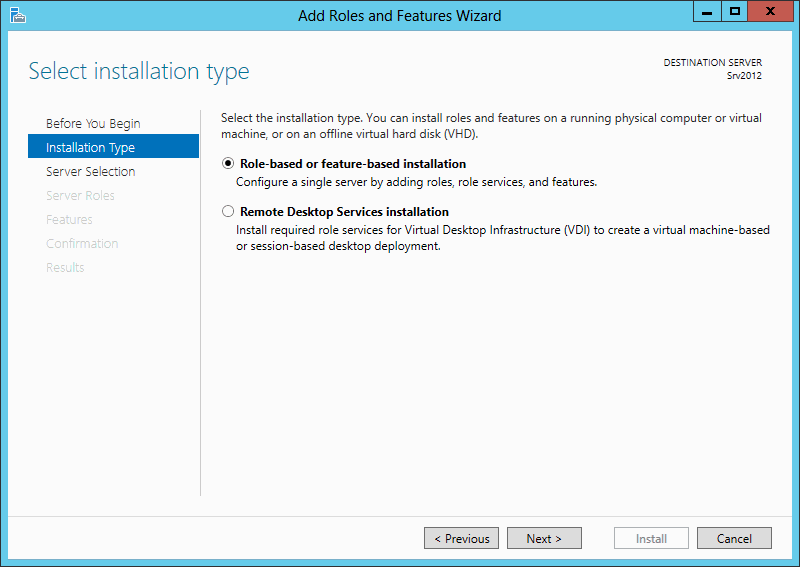
By the way in windows server 2012 Remote Desktop Services are separated from the rest of the roles. One more information is that if you want to remove server roles or feature, this is the place you will need to come back to. Now let us install Active Directory and make sure Role-based or feature-based installation is selected on the next screen.
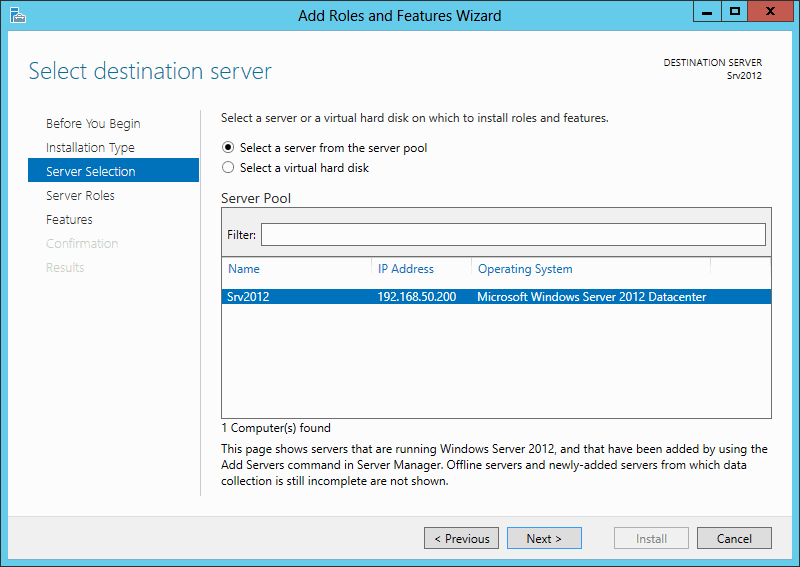
On the next screen; select the server where you want to install AD. It is understood that you already named your server in a human readable form, unlike the defaults are accepted and you will ended up with a peculiar naming convention. Another feature of server 2012 is you can add, manage and install roles on remote servers from a single management console. So moving ahead, select you server from the server pool; and this server will be promoted to a Domain Controller gradually.
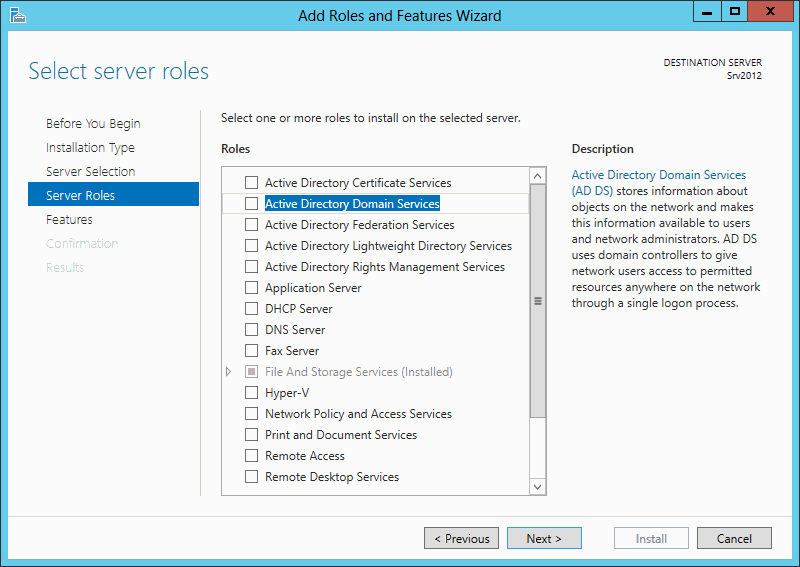
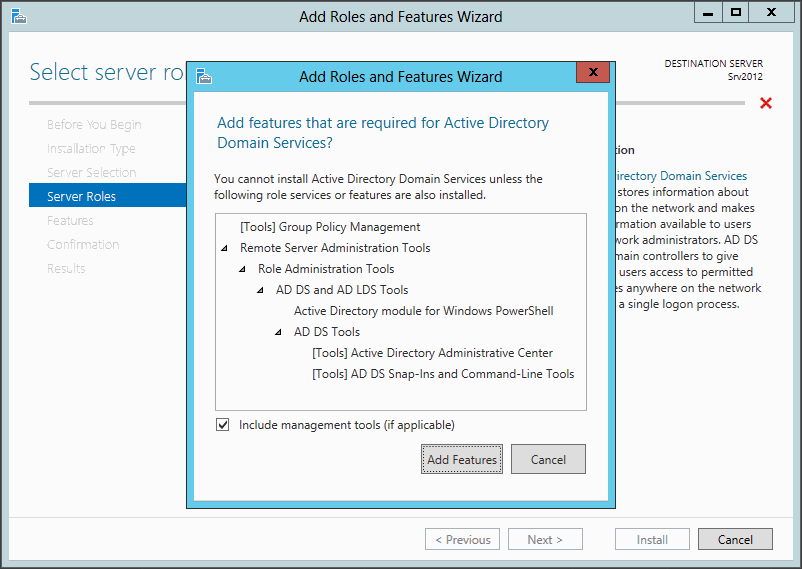
And after selecting the server, click on Next. On the Select servers roles page check the Active Directory Domain Services box, the click Add Features on the window that pops-up. Again click Next button to continue.
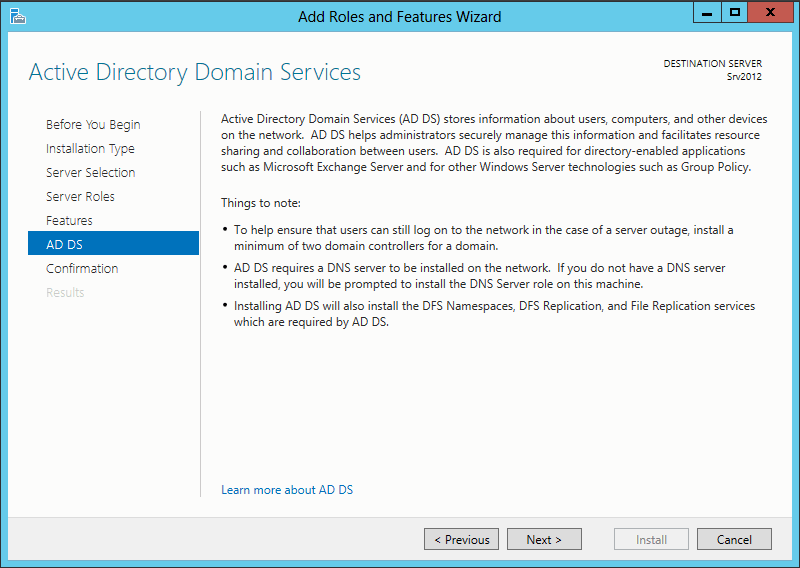
At this point, read on the right side quick information of the role ADDS. Also install the dependencies that needs to be installed prior to install the ADDS. And also check the box for installing the management tools to manage ADDS.
There are no features to select in this screen, so just move on with the wizard by clicking the Add Features button. And once again click on the Next button.
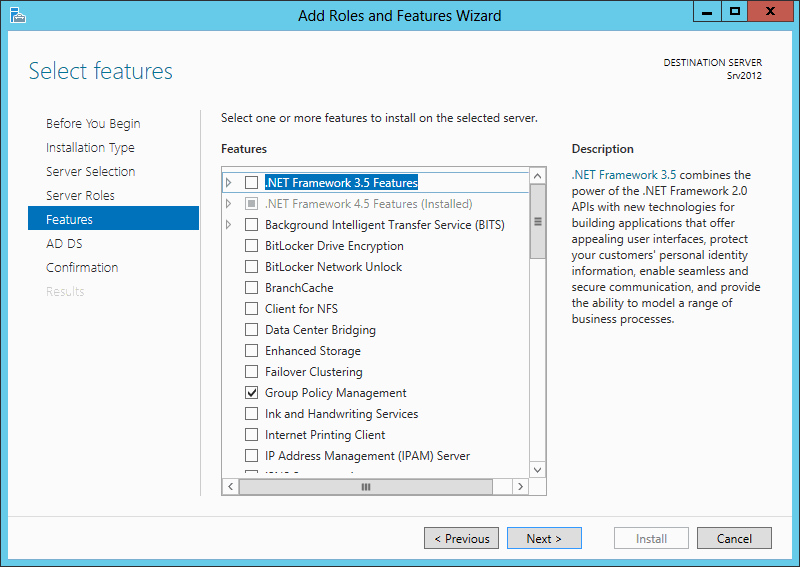
At this point install the .NET Framework 3.5 Features. You will need it on so many cases; so select it and accept the defaults and click on Next.
And at this point the AD DS installation starts. Please read the note if you are doing it for the first time. The second bullet point is vital to the AD installation.
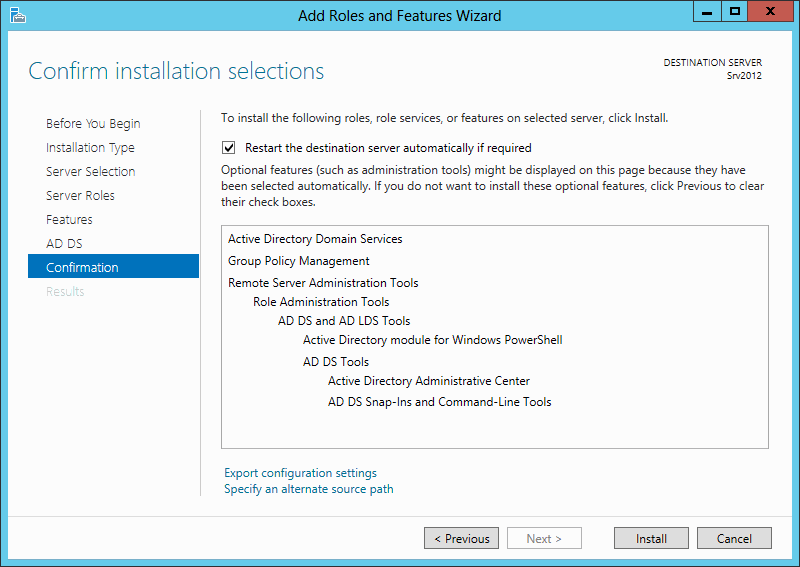
If you want the server to automatically restart, if required, check the box Restart the destination server automatically if required. Click Install. If you want you can close the wizard during the installation process, and it will be minimized into the Taskbar, and it will run in the background.
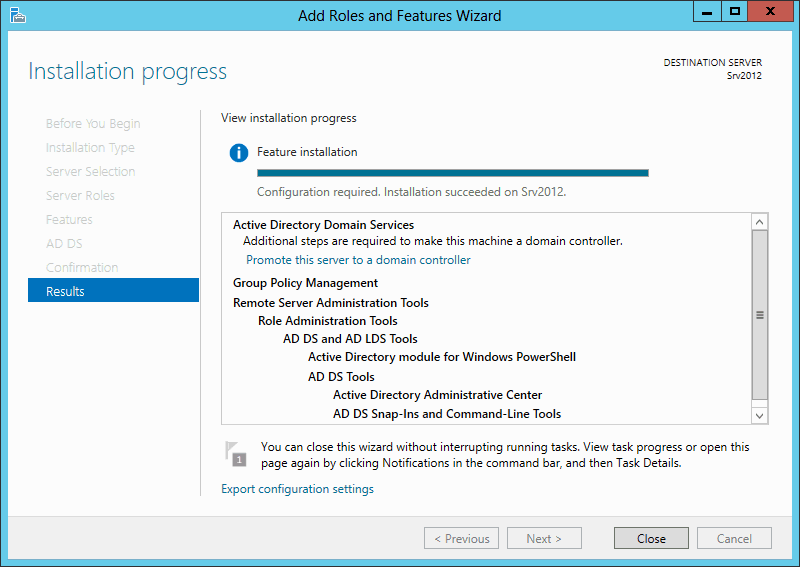
After the role and features are done installing you need to click the Promote this server to domain controller link to promote this server to a domain controller. There are other ways to promote the server, but that is another discussion and we will do it in another session.
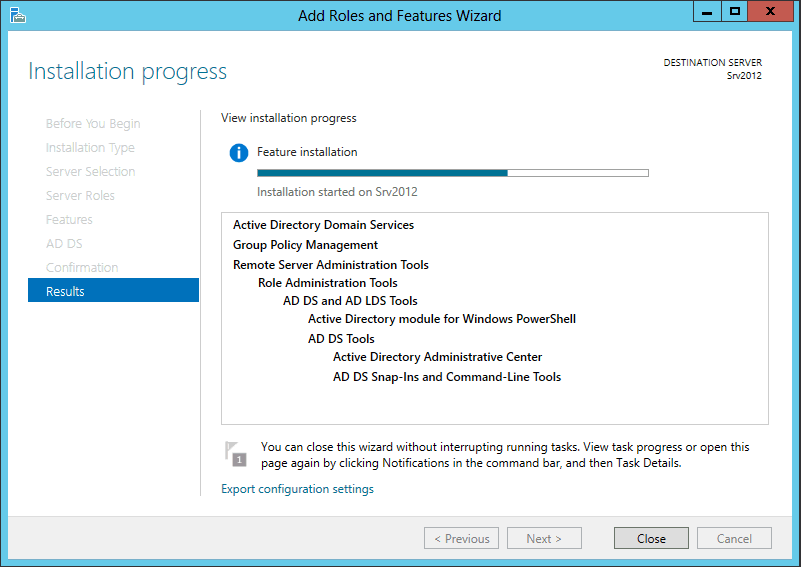
If you would like to export the configuration that was just changed with the server configuration; export it to your desired folder. It’s a good idea to keep a track of what you are doing. And finally click on the Close button.
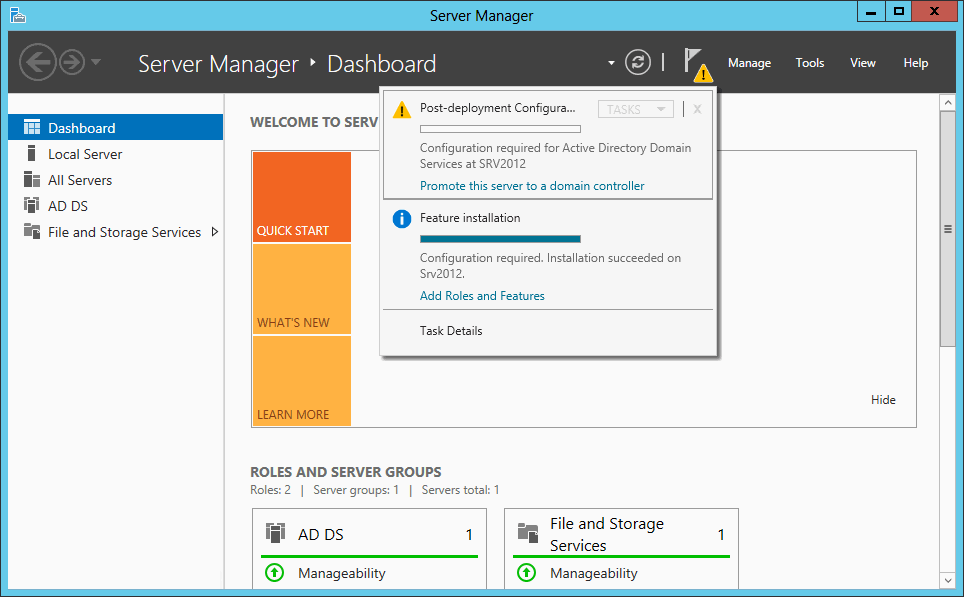
As shown on the following screenshot; in the Server Manager you will see a yellow triangular exclamation mark at the top of the window. Click it, and click on the Promote this server to domain controller link. Now you can make use of this link and start the server promotion.
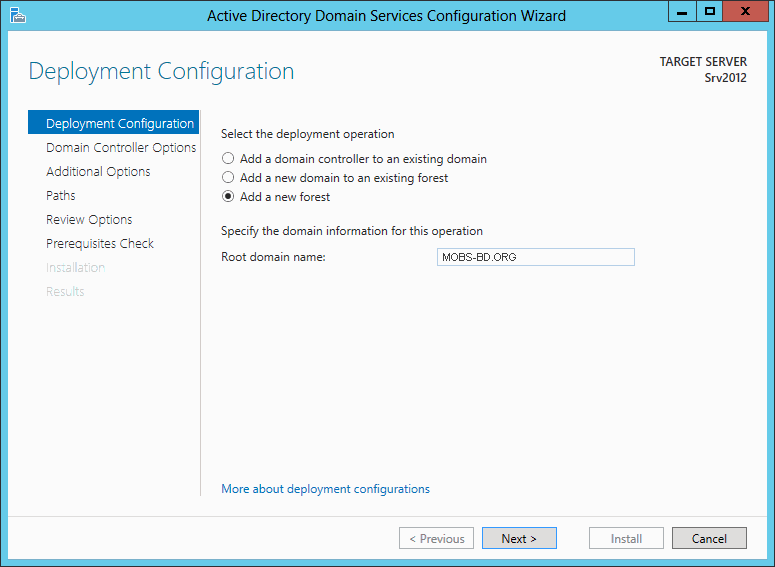
Now the deployment for the Active Directory Configuration Wizard appears. Since this is the first domain controller, select the Add a new forest button, and in the Root domain name, type the domain name you want for your environment. I have placed my domain controllers name here in this example as MOBS-BD.ORG.
Now the forest functional level, it’s best not to use any Windows Server 2003 based servers in your domain, but do so unless you have to. I’ve put both options for Windows Server 2008, means at least Windows Server 2008 can be added as a domain controller, older editions cannot be added.
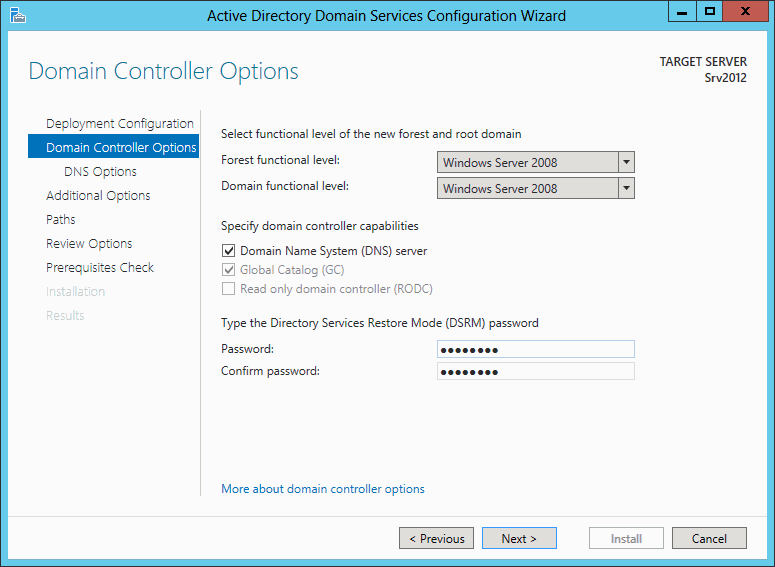
Please be mindful that I have checked the DNS service within this installation and this Domain Controller will be the Global Catalog server for the entire domain. Type the Directory Service Restore Mode password and click Next to continue.
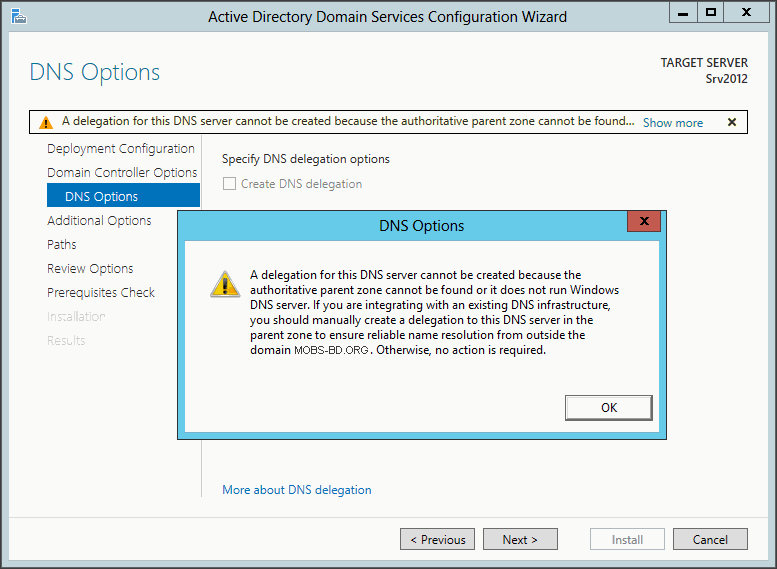
Now you will get an informational message that primarily means that there are no DNS servers or a zone name after your domain name in the environment. Click on OK showing that you have understood the message. If you are wondering how you have made that warning to pop-up, just click the Show more link on the yellow message at the top.
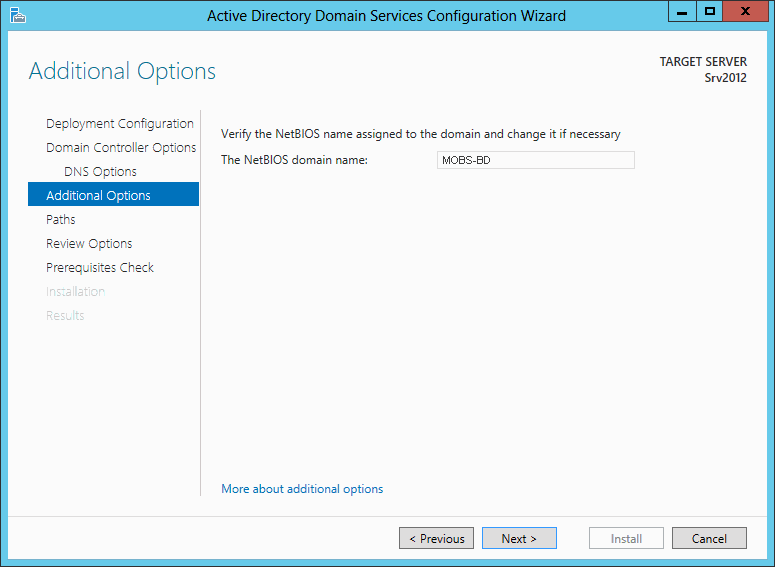
Leave the default NetBIOS name that the wizard is providing and click Next. This is primarily your domain’s local IO subsystem.
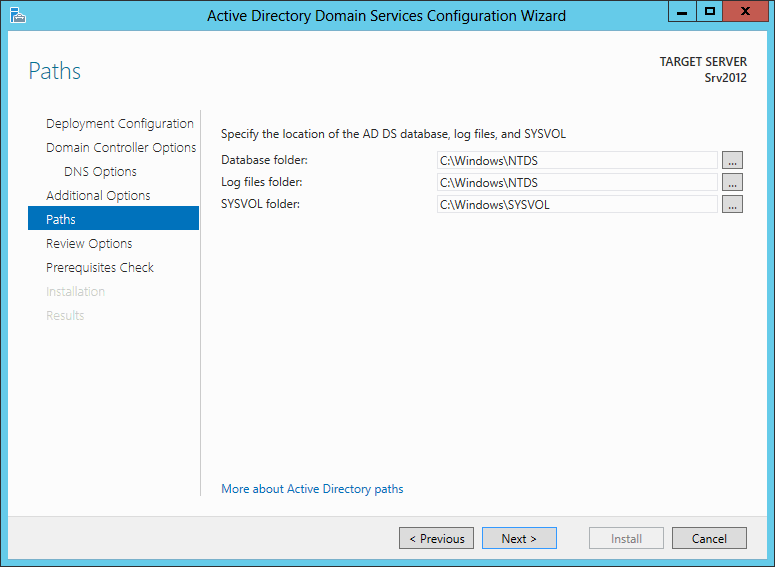
Accept or change the default Database, Log and the SYSVOL paths and click on the Next button. best practice is to have these on a different drive other than C. Also put these in a redundant drives as well where at least a mirror or RAID-5 is achieved.
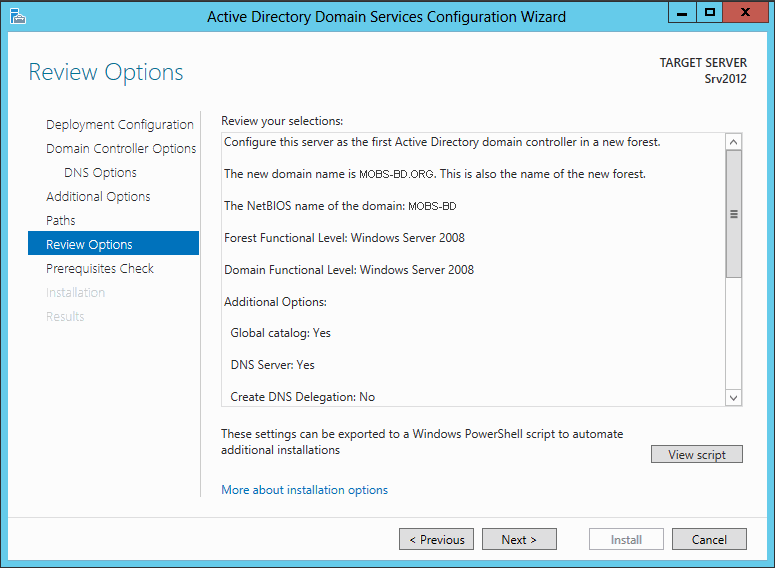
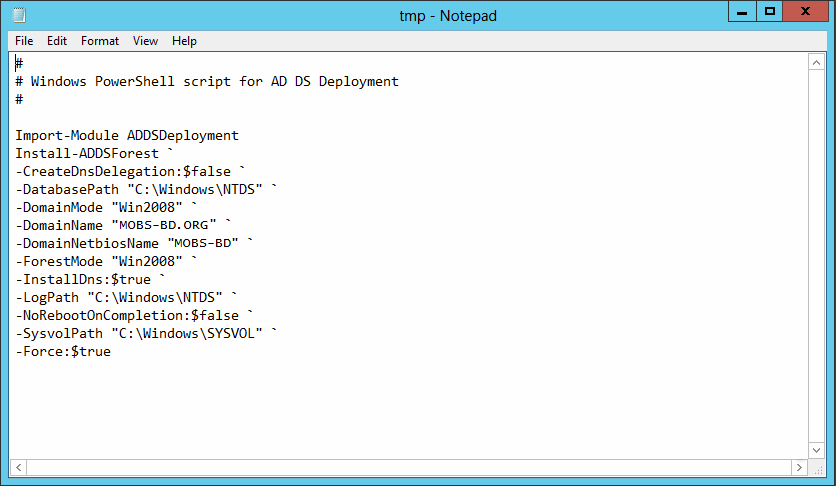
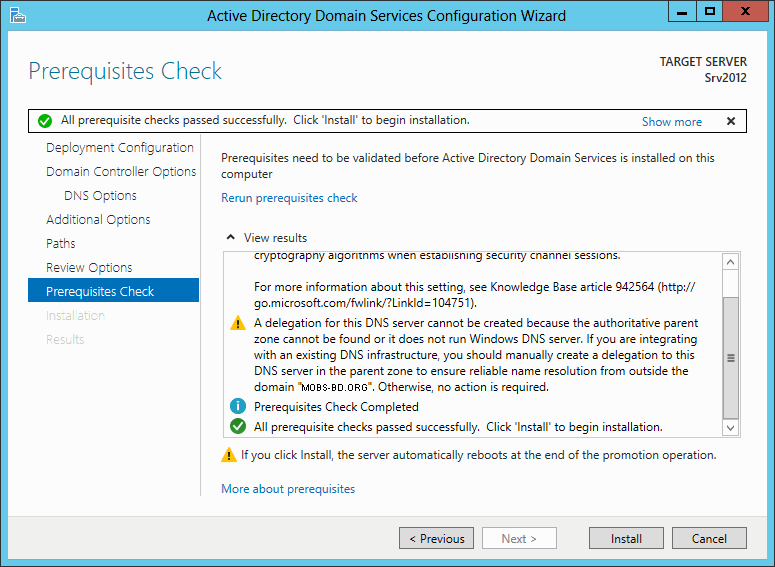
At the Review page you can view the script that is going to be used by the wizard to promote the server to a Domain Controller. It’s always a good idea to have a look at it. The script would be looking like the following screenshot.
The server will verify if all the prerequisites are available, installed and ready to use. If you feel comfortable with the existing modifications you require to install, click Install to start the server promotion. When you click install DNS and the GPMC are installed automatically.
The process will take just a few minutes, and when is done the server will automatically reboot, because we have checked to restart the server after the promotion completes. The installation screen would look like the following screenshot.
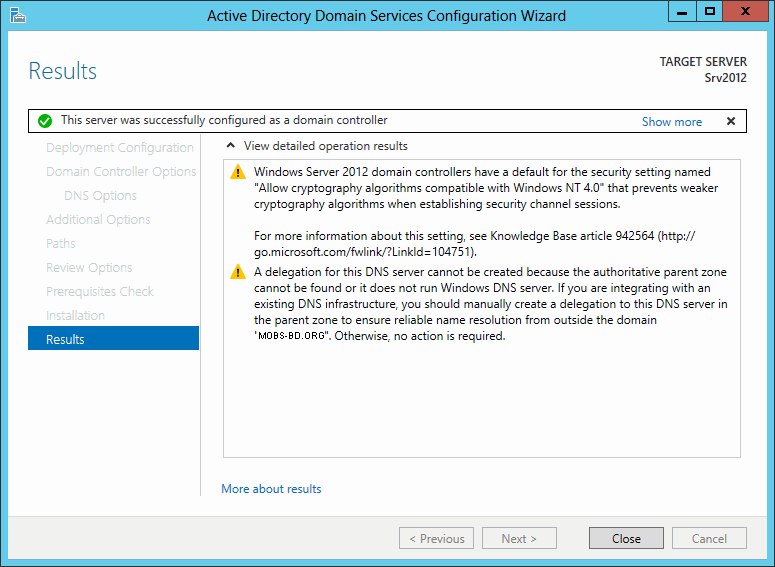
And click on the Close button accepting the fact that this server is successfully configured as a Domain Controller. After rebooting the server, you will be presented and forced to change the Server Administrator password to a more complex one, since this server is promoted to become a Domain Controller and certain complexity are already in effect.
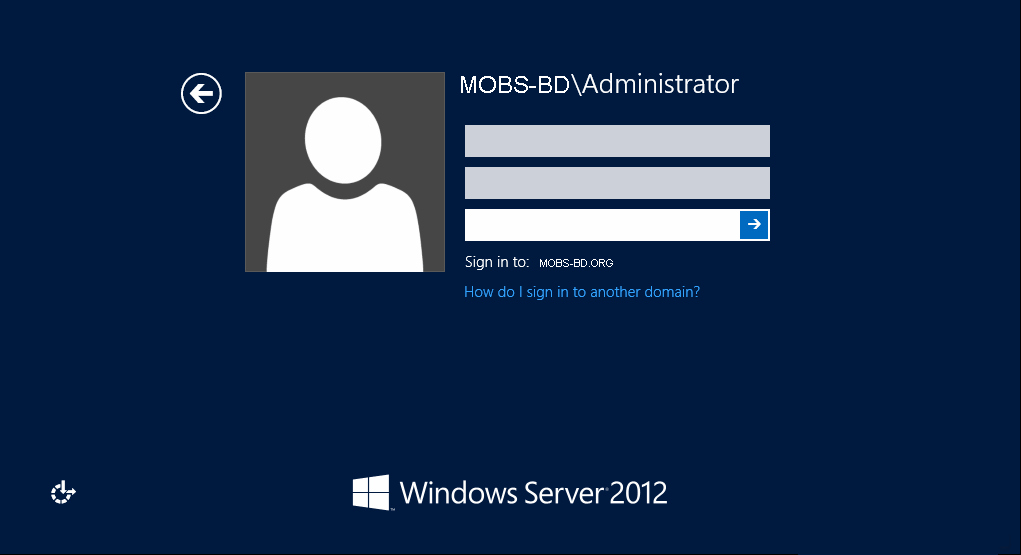
Log in and verify that everything is in order; Active Directory, DNS etc.
And you will see that in the server manager, roles and features of AD DS has been added as a server service. This primarily verifies that your server has been promoted to a Domain Controller.
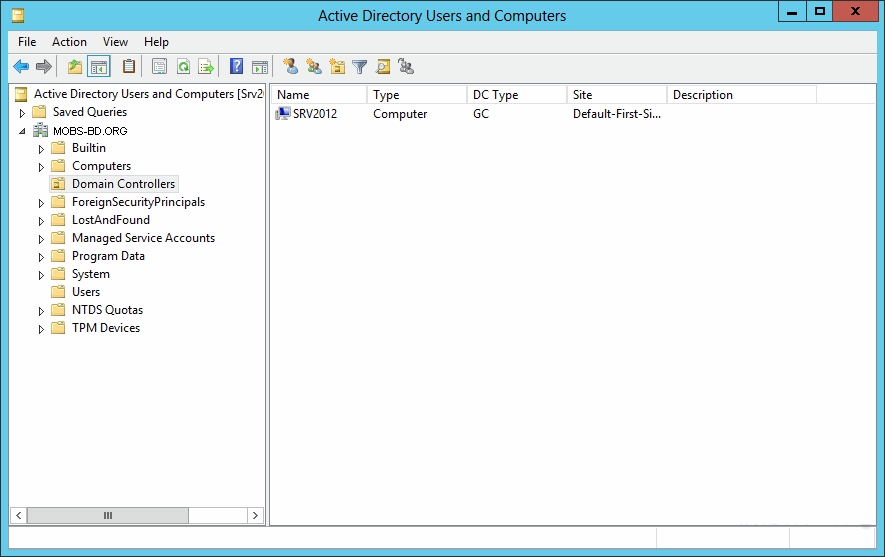
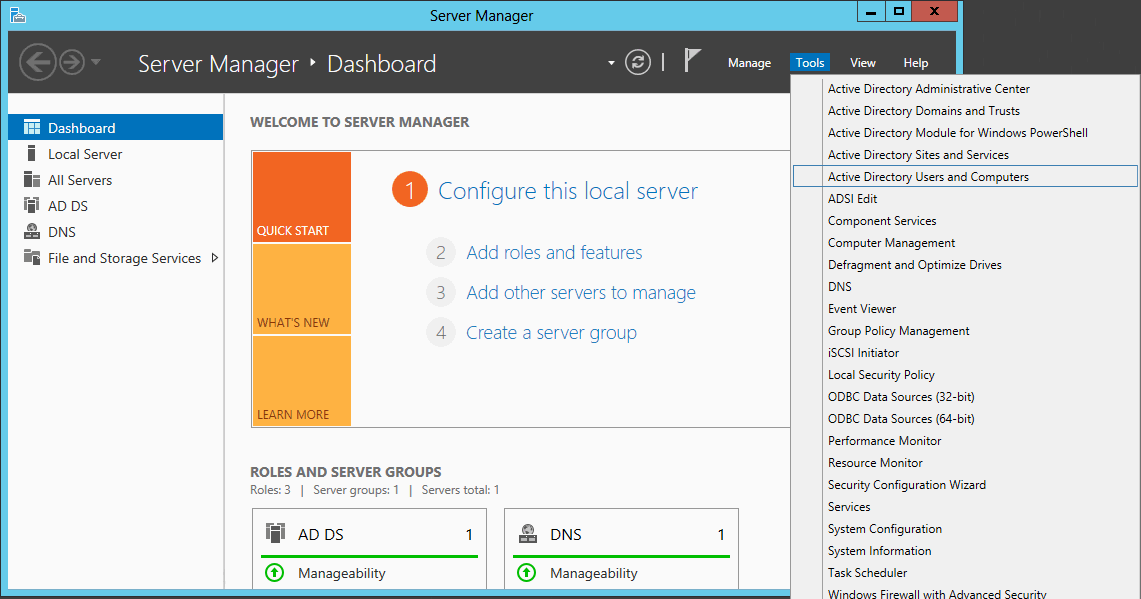
If you want to go to the Active Directory Users and Computers, you will see that MOBS-BD.ORG is showing up as a domain controller, and the following roles or services has been installed:
- Active Directory Administrative Center
- Active Directory Domains and Trusts
- Active Directory Module for Windows PowerShell
- Active Directory Sites and Services
- Active Directory Users and Computers
- ADSI Edit
- DNS
- Group Policy Management
And at this point you are all done creating your First Microsoft Windows 2012 DataCenter Edition Domain Controller, a global catalog server.
NOTE: This was a live installation recorded earlier. Screenshots are somewhat edited. So, please don’t confuse yourself where edit marks are present. As I cannot disclose the actual address of the domain, reason why the edit took place.